

How To Repair Rubber Heels On Boots
If someone else could walk a mile in your shoes, would they complain nearly the draft from the hole that's developed? Or would they walk crooked because the heel was worn out? Whether you're traipsing through a national forest, out delivering mail, outside edifice a house, or walking through the infirmary on rounds, our shoes protect u.s.a. from foreign objects and keep us warm and dry during choppy weather. Then, when your shoe has some damage, your instinct might be to throw your old pair out, just it's easier than yous think to repair boots and shoes that seem completely worn out.

Desire to know how to rebuild or repair your boots and shoes? Hither are the 4 basic types of shoe repair:
- Repair delaminating soles: A delaminated sole is what happens when the sole separates, which can occur frequently in hiking boots or fifty-fifty in tennis shoes that become used often.
- Seal leaks: A crack or a hole tin ruin a good pair of waterproof or condom boots that are supposed to go on your feet dry. Seal it upward with an adhesive and continue right on walking in the rain.
- Rebuild worn out soles and heels: Heavy usage leads to clothing and tear on soles and heels, but these can actually build them again to final.
- Repair rands and boot panels: The elevation pieces of a shoe like a rand or a boot panel can be a real hurting if they go torn. Luckily, they are easily sealed back together.

Completing all of these repairs is a cinch with GEAR AID Aquaseal SR Shoe Repair Adhesive, which is a flexible condom glue that won't cleft or peel, even over a long period of fourth dimension. It's also waterproof, clear, and chafe resistant so you don't have to exist tiptoeing effectually in your shoes. Feel gratis to stomp and splash only similar you did earlier, whether your shoes are made out of leather or safety. Best of all, this adhesive is permanent, so you lot can rest assured that you won't take to keep fixing it over and over again.
For these mutual shoe or boot repairs, you'll need just a few supplies to go these projects started.

- Aquaseal SR Shoe Repair Agglutinative
- Isopropyl alcohol (max 70%)
- Cleaning material or brush
- Application brush
- Duct tape
- Sandpaper for sole repairs
Estimated Time:
- Prep and Application: 10-15 minutes
- Cure: viii-12 hours
Repair Delaminating Soles
Got a work boot sole that needs re-bonding so it'due south not flapping effectually while yous walk? Here are a few simple steps for a repair using our flexible shoe repair adhesive.
- Remove dirt with a strong castor and make clean the surface thoroughly with isopropyl alcohol.
- Apply the Aquaseal SR adhesive evenly on the sole for skillful adhesion.
- Using a clench or tape, hold the sole and upper boot tightly together overnight to cure.
Pro Tip: Keep boot soles away from the campfire to foreclose the manufacturer's glue from melting and causing it to peel/delaminate. If your boots practise start to peel, utilise Aquaseal SR to permanently fix information technology.

Seal Leaks
Leaks tin can happen and ruin a perfectly practiced pair of waterproof boots or shoes. Patch them upward in just a few minutes with the post-obit steps:
- Become the repair area squeaky make clean with isopropyl alcohol.
- Apply Aquaseal SR over the cracks in the soles, filling it in every nook and cranny yous tin encounter.
- Set the sole on a level surface area and allow to fully cure (taking about viii-12 hours).

Pro Tip: Waterproof kick seams and stitches with Aquaseal SR forth the seam or between the sole and the upper part of the shoe straight with a brush or toothpick.
Rebuild Worn Heels
Your boots are fabricated for walkin'—that is, until the heels get worn out of them. Ready them up in just a few steps:
- Sand down the worn area and clean thoroughly with isopropyl alcohol.
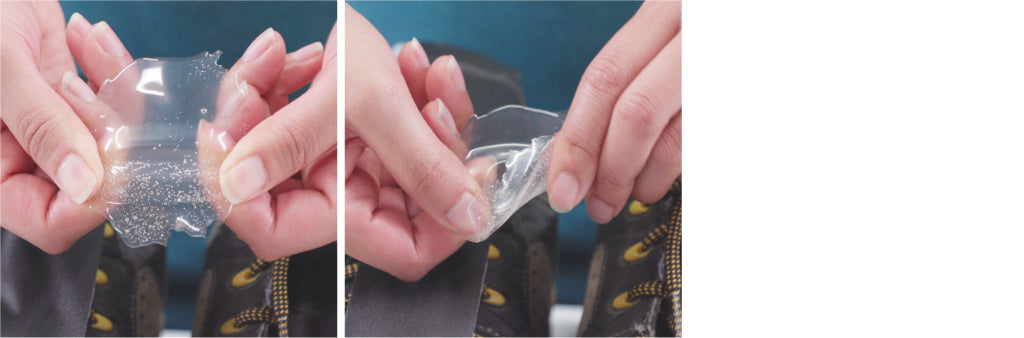
- Place duct tape around the edge of the heel to form a "dam" that will serve every bit a mold for the agglutinative and will harden into the new heel.
- With the kick however upside downwards, set the sole on a flat, level infinite and then use Aquaseal SR and allow to fully cure for about 8-12 hours.
Repair Peeling Rand
The rand is a sparse prophylactic layer that goes over the top of a hiking boot and is designed to prevent injury from sharp objects. When information technology starts to peel, however, information technology can brand your anxiety vulnerable to the elements. Here's how to fix it right up:
- Remove clay from the rand and clean with isopropyl alcohol.
- Utilize Aquaseal SR in the rand's gap.
- Tape firmly in identify with a pen applying pressure level directly on the rand. Permit cure for 8-12 hours.
Repair Torn Kicking Panel
A torn panel on a boot can be uncomfortable, but luckily, information technology's an easy fix cheers to Aquaseal SR. Here's what you lot demand to practice:
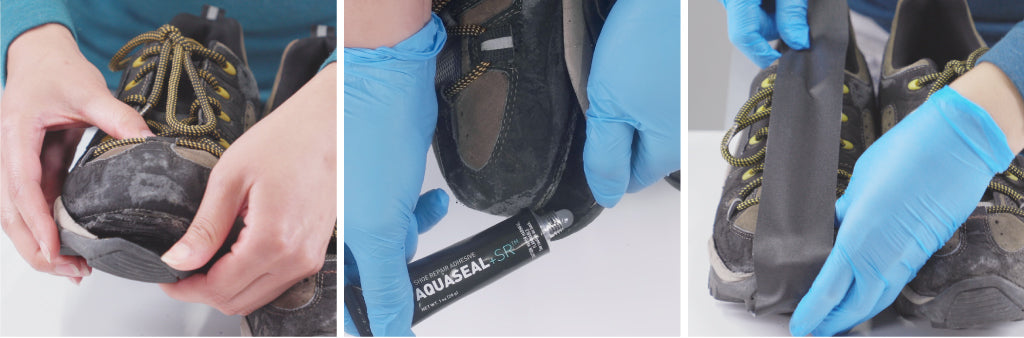
- Clean the panel thoroughly with isopropyl alcohol.
- Advisedly utilize Aquaseal SR to both sides of the torn area on the boot panel.
- Press the two pieces together and agree in place with tape overnight to cure.
Pro Tip: Relieve pressure and requite your boots a custom fit with "skip lacing." By skipping holes when you lace up your shoes, you can have force per unit area off sensitive areas.
Source: https://www.gearaid.com/blogs/learn/repair-boot-shoe-sole-how-to
0 Response to "How To Repair Rubber Heels On Boots"
Post a Comment